MarinePix Photographic Art
21st March, 2015
LRPS!
Pash's LRPS panel - by MarinepixAfter several weeks of preparation, and a little last minute panic, both Pash and I managed to pull together a panel of 10 images each which we submitted to the Royal Photographic Society judges at the Photography Show at the NEC this weekend.
It was a well organised and rather formal affair. Panels of 10 images were laid out in front of five judges plus a chairman. They deliberated on each panel for a (surprisingly) short time - about 2 or 3 minutes; One judge offerred their personal opinion on the images and the chairman then announced whether the photographer was being recommended to the council for LRPS status.

It was nail-biting stuff; Although the first three submissions were successful, the next four, prior to Pash's being shown didn't make the cut. When Pash's prints were put on display, the judges sat for rather longer than they had for the other panels, taking in what lay before them. They got up to have a closer inspection but personally, I think they'd already decided their verdict... although the judges were talking amongst themselves, we overheard the word "amazing" a couple of times. Nevertheless, it wasnt until the chairman congratulated Pash by name that we both breathed a sigh of relief!
Rob's LRPS Panel - by Marinepix My panel followed and much the same happened. It amused me that the chairman said Pash's images were "so different from normal submissions" when we knew I was next with ANOTHER set of underwater shots. Having said that, I decided to include some of my top-side shots too, just to show variety and I'm glad I did as I got some very postive feedback on those too. The judge said I was clearly passionate about the water, both above and below.
So, we were both really excited to receive recommendations for LRPS.
Click the images above to enlarge them.


17th February, 2015
Monochrome dolphins - by Marinepix I was asked to give a talk at the February meeting of the British Society of Underwater Photographers (BSoUP).
Some time back there was a Black and White Challenge on facebook - the idea was to post 1 black and white image a day for 5 days. I took up the challenge but at the time I couldnt bring myself to convert any of my underwater images. There's just so much colour below the surface! Instead I concentrated on above water pictures
In preparing for this talk, I spent ages converting 150 of my images in order to determine which looked good in black and white. Some worked, some didn't, some I've now decided look better in black and white! This photo of spinner dolphins in the red-sea is one of those.
I'm rather pleased I've gone through the process; it's made me more aware of what to look out for and I'm hoping it will improve my colour photography too!
I've uploaded a PDF version of my presentation for those that might wish to read it. The first part concentrates on subject selection (what makes a good subject and what specifics to look out for, etc). The second section focuses on some of the techniques involved in converting to black and white on the computer. I concentrated on methods available in Adobe's Lightroom software... mainly because I'm very familiar with it but secondly because it's a very popular and easy to learn application.
You'll find the PDF here
I got good feedback after the talk and I was really happy to have so much support from friends and respected peers. I was also really happy to be able to relax after the break and listen to Matt Doggett give a talk about his diving adventures around the UK. Matt was named British Underwater Photographer of the Year at the dive show earlier in February.


14th November, 2013
Storrington Camera Club Presentation
Marinepix Robert White Whaleshark Tonight I was delighted to present some of my work to a group of enthusiastic photographers and friends at the Storrington Camera Club. The club meets on alternate Thursdays at 7:30 and it was well attended tonight. Preceding me, Chris West and Liz Barber gave an interesting talk about the procedures and benefits of joining the Royal Photographic Society... something I'll now be considering.
I'd practiced my talk a number of times and worked out that it'd take about 45 minutes leaving me plenty of time to show my camera gear and answer any questions. I clearly talked too much as I had only 3 minutes left at the end in which to field questions and hold up my camera set up!
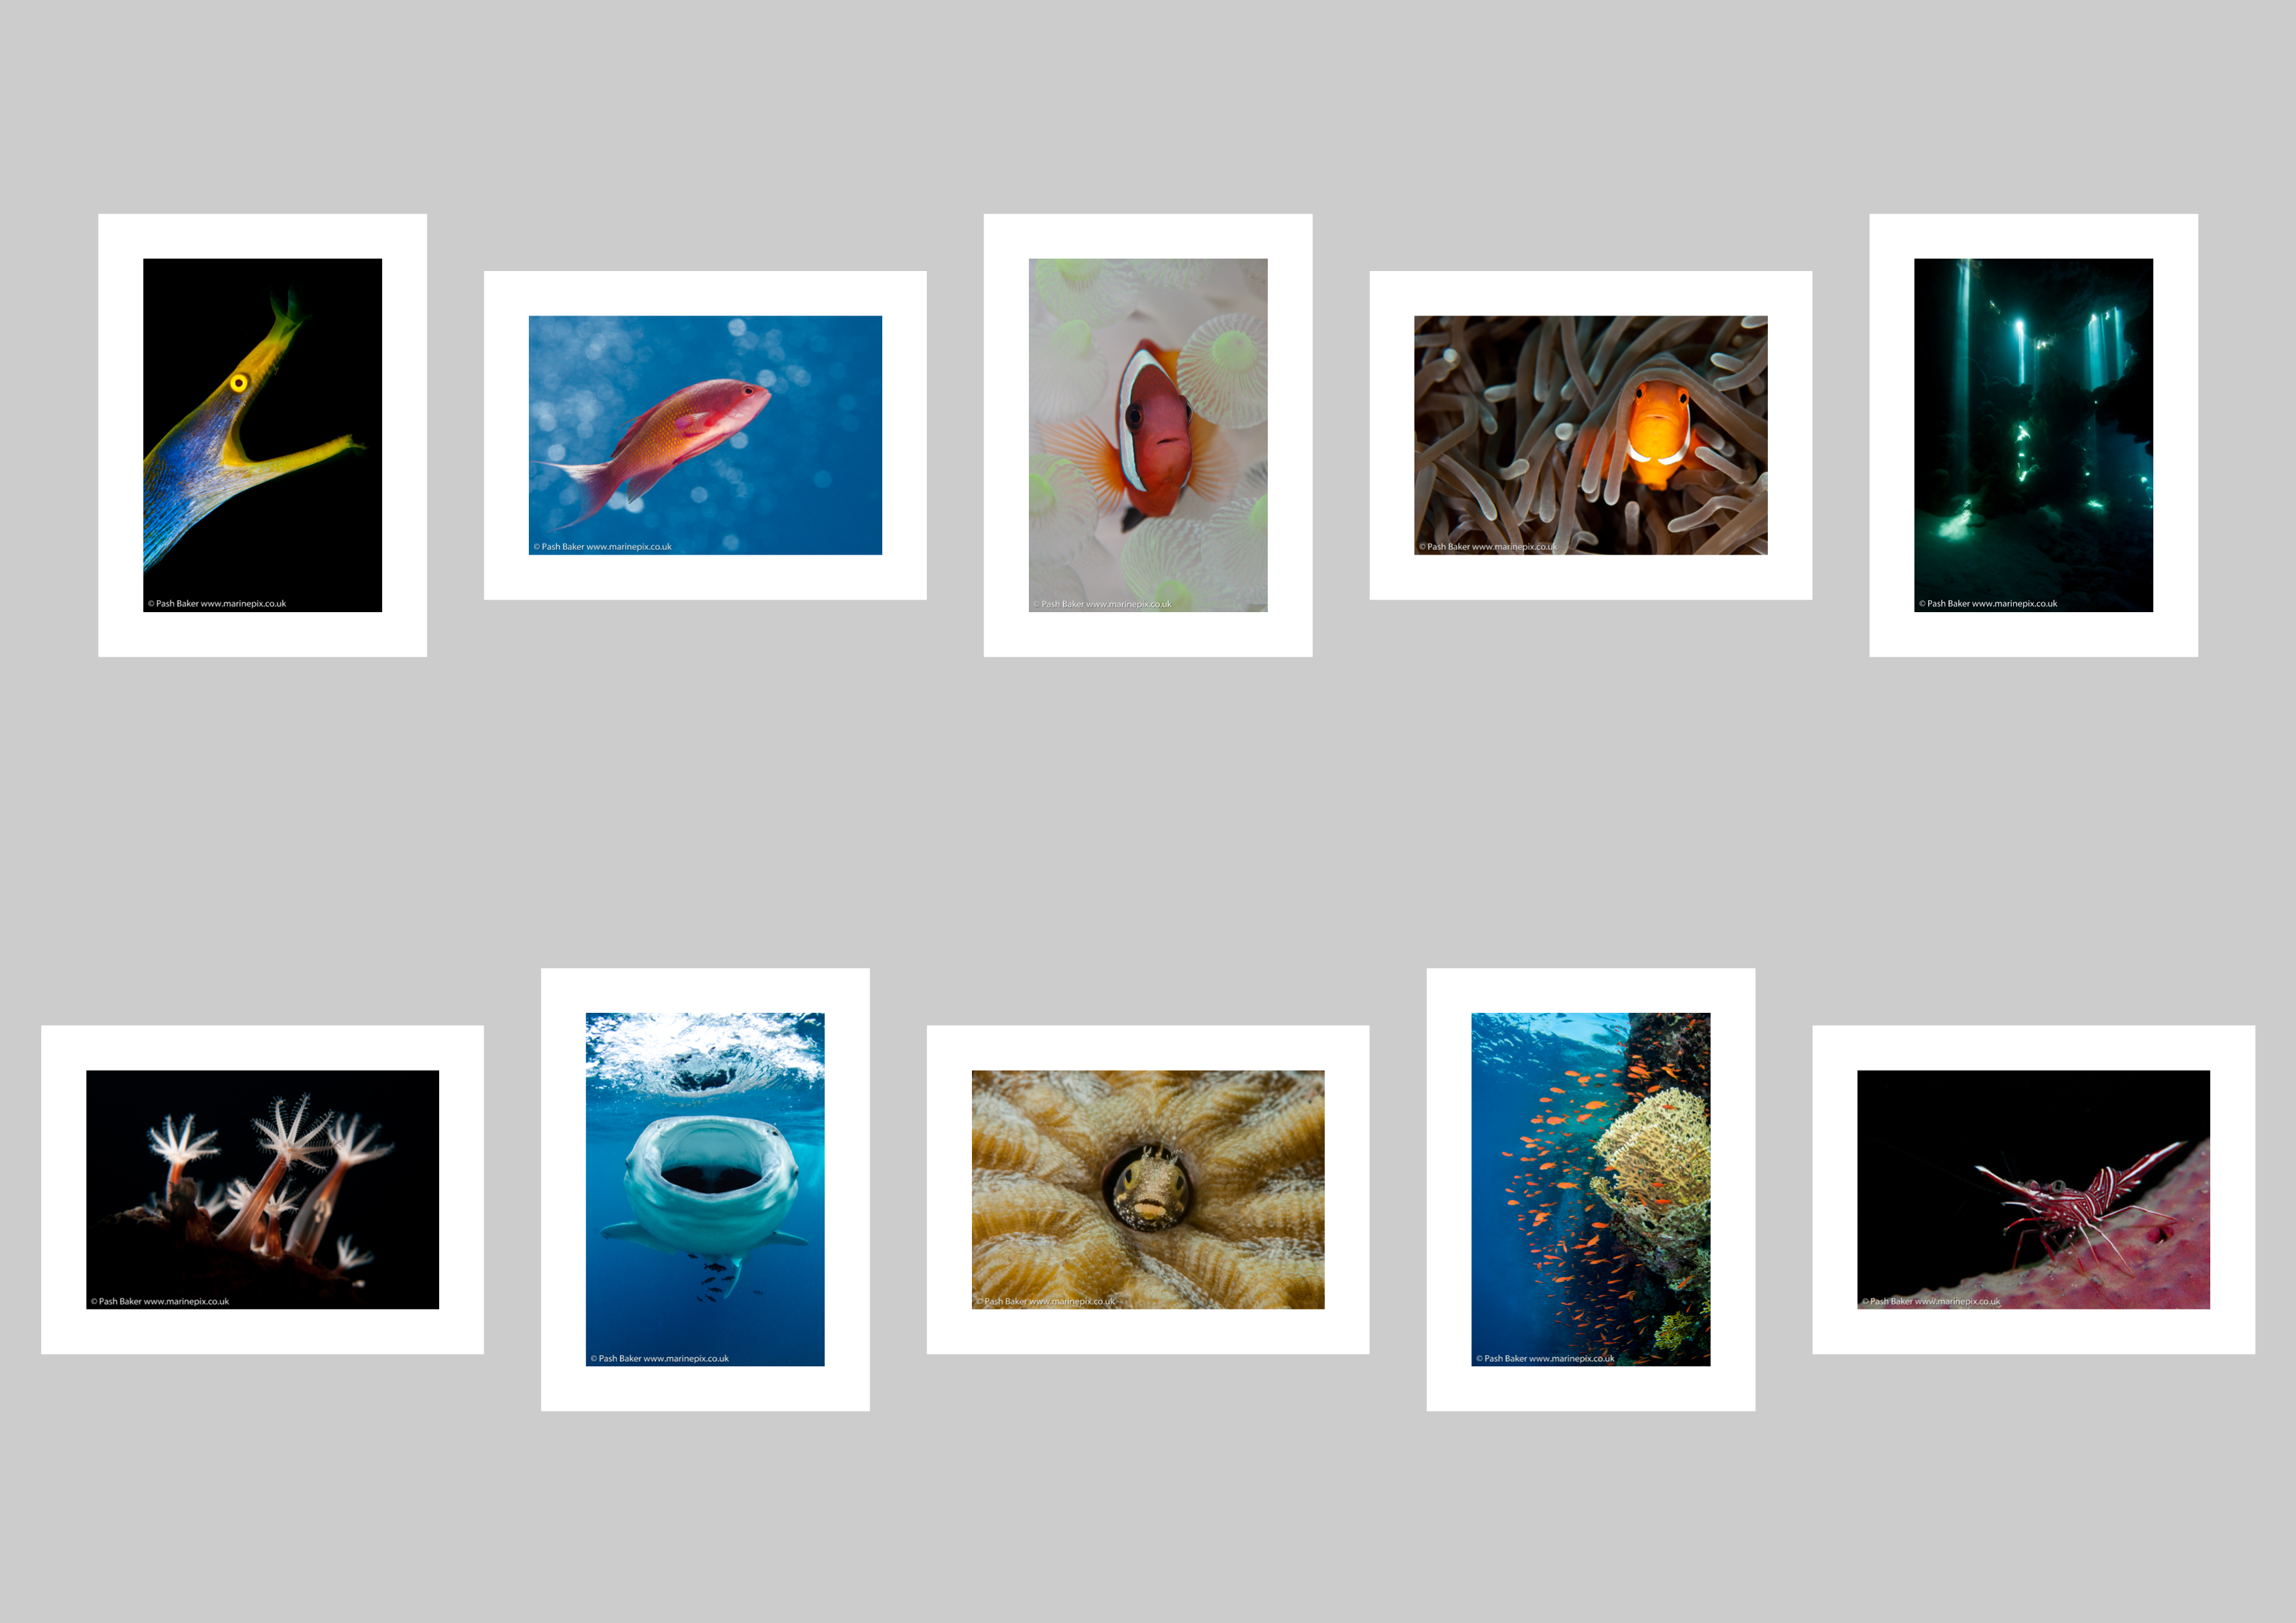
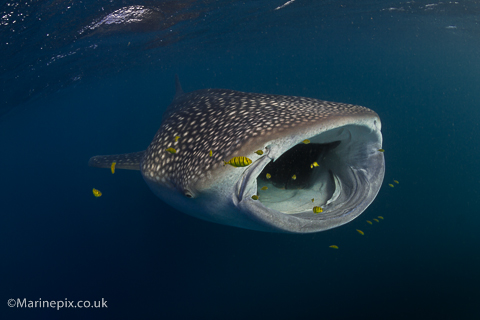
I split the talk into 2 main sections - first I spoke about my first compact camera and housing and I showed some of the images I took with it, both in the Philippines and back in the UK. I then went on to show images I'd taken with my Canon DSLR (550D) and I explained the fact that I have to choose a lens before I go under the water so I'm limited to taking the same type of shot for the whole dive... and I have to choose between wide angle or macro.. with the ability to capture "portrait" type shots with either. I think the biggest reactions came whilst I was showing my wide-angle shots. Whale-sharks and some of the shipwreck images seemed to go down well and I enjoyed showing the bright colours of some of the more close-up stuff. There were times when I realised I didnt know why I had included an image and I ended up saying "well, I like it anyway!" which I think was a little lazy of me. It gives me the impetous to actually really closely analyse why I like an image and why I'd like to show it rather than just including images which my instinct tells me I like.
The final section of my talk showcased nudibranchs and shrimp and I followed up with a series of other macro images. The final image was, I have to admit, one of Pash's anemonefish photos, primarily because I didn't think a talk would be complete without them but second because I wanted to recognise her efforts and determination to get back in the water and take some cracking shots. Of course, I didnt explain this to the group, I simply said it was one of Pash's photos because she does clownfish shots better than me :-)


14th April, 2013
Farne Islands Seal nibbling my fin amongst the kelp - by Marinepix 
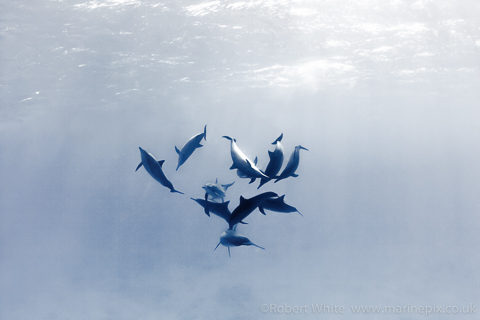
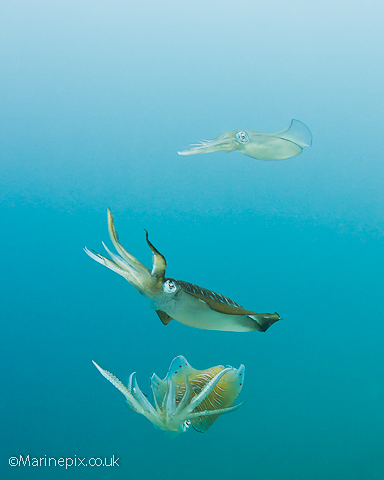
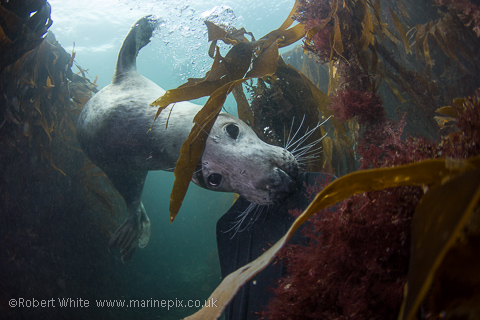
Although this is a fairly old image, I've been prompted recently to consider that people enjoy seeing the "fun" stuff that I've taken. Never have I had closer interactions with marine life than I did on 2 consecutive weekends in late 2011 when we visited first Lundy Island and then the Farne Islands... Pretty much opposite ends of the country but very similar sorts of encounters.
Whilst in Lundy, the seals seemed to stay around and "play" with us for longer, there were far more seals up in the Farne Islands:- At one point, whilst moored up for lunch we were surrounded by scores of tiny dark faces, all watching us from the water.
The skipper seemed keen to take us to a dive site where we could get some depth. It took some effort to persuade him that we were in exactly the right spot already with all the seals around us! I dont think we ventured deeper than about 3 metres that dive but I'm really glad we didnt. It was quite overcast and going deeper wouldve meant heavier use of artificial strobe lights and likely the inability to incorporate the surface into our photos which can really enhance a shot sometimes.
The seal here is simply one of those I've not published before although the gallery on the site has been in place for over a year now. It was only whilst i was browsing through, looking for "fun" shots that this one stood out.
I was tucked into a small gulley, along which I'd seen several seals pass. I thought if I hung about long enough, I might get a swim-past. I was treated not only to a seal who stopped for a moment but to a full-on fin tugging, playful seal who ducked in and out of the kelp, eyed me up and nipped at my fins:- altogether very reminiscent of an energetic puppy wanting to play.
Camera settings here were 1/250th sec, f/4.5 and ISO 200. I used a tokina fish-eye lens set to 11mm focal length. My 2 strobes were set to low power since I anticipated a reasonable amount of particulate in the water which I didnt want to light up.
If you feel so inclined, you can like the photo here which will put a note onto your facebook timeline. You should be able to share it from there but please make sure you mention my website.


25th February, 2013
BSoUP Lionfish
Vangogh Style Hunting Lionfish 
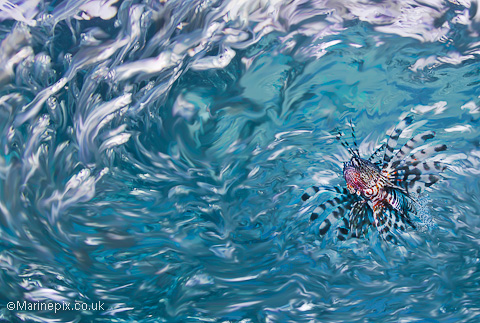
I was very pleased to come 4th in the BSoUP competition this month - the theme was "Photoshop Bonanza" . The brief was to be creative with image editing software like Photoshop. You can see the other winning images on the BSoUP website here.
I decided to try emulating Michael Aw's amazing Van Gogh style images which I saw via facebook last year.
A bit of research lead me to understand that "pixel bender", an add-on tool for use in photoshop, would help me create the sort of image I was after. A LOT more research made me realise that this tool was very difficult to come by! Apparently, it's built into the latest version of Photoshop but I found it impossible to find something which worked on previous versions!
The deadline for entries into BSoUP competitions is midnight and it was approaching that time fast so I figured I'd have to just crack on and create my image manually!
I had several candidate images but I selected an image I took in Nuweiba last year... Since there were a lot of lionfish and a big school of bait-fish hanging around, I'd tried to capture an image similar to those which Alex Tattersall had so much success with.
Although I don't think I really got the photograph I was after, I still got some images and for the competition, I chose one which I thought would withstand manipulation... My intention was to keep the prominent subject sharp, perhaps enhancing the colours and contrast a little, whilst blurring the background with swirl patterns. The uniform pattern created by the bait-fish lent itself well to the technique I was trying to apply... I set to work using the smudge tool to drag the background ink with my cursor. I started trying to create swirl patterns but I found it tricky because the baitfish blurred too much... I felt I'd already managed to create a sense of movement which I liked so I continued the effot. The fish were "dragged" but were still recognisable.

So, I've ended up with an image I quite like but not really similar to what I set out to acheive. I enjoyed the process of manipulating the image but I don't think I'll be doing it with all my photos just yet.... There is far too little time in the day for that kind of thing!
Hope you like the image as much as I do and if you voted for it at the BSoUP meeting this month, then I thank you!! :-)


23rd February, 2013
Robs DIY fibresnoot - by Marinepix A discussion on facebook about snoots has prompted me to write this blog entry regarding the fibre-snoot that I made for myself.
For those not aware what a snoot is, it's a contraption which shapes the light used when taking a photo. To explain further, I've created a gallery which shows how I made the snoot and some of the end results. But I digress.... The purpose of this post is to explain how I created my DIY fibre-snoot for my underwater photography work!
It took some time to start the whole process off. I knew I had to have a bendable tube and some fibre-optic cable of course and a base of some sort but the base was the tricky bit as I didnt want to end up bolting tubes to flat discs - that would be too time consuming and bulky
Eventually, I had a brainwave and realised that a CD spindle (the kind you get if you buy a stack of blank CDs or DVDs) was exactly the right size and shape and it had a ready made hole through which I could poke some fibre-optic cable. It took a few goes to get this (major) component to be the right shape... some of them cracked when I cut into them and on some I got the positioning a little off:- The hole where the cable goes really has to be directly over one of the flash tubes to get the most amount of light.
I tried a few brands of flexible pipe initially but they all tended to be relatively transparent, apart from Loc-Line so that's what I now use.
Fibre-optic cable isn't that hard to find on ebay. The issue is really that there's too much to choose from! I bought a selection so I could experiment... The largest unsheathed cable was 3mm diameter but I soon decided that smaller strands (2mm) would be better as I could fit more of them through the centre of the flexi-tube. I used this configuration for a long time, with electrical tape being used to hold all the strands of cable together before I found a better solution:- some 6mm sheathed fibreoptic cable - I strip the sheathing off first and the bare cable then slides straight in! This produces a much stronger light, plus there's no need for sticky electrical tape!
triplefin goby under snoot light - by Marinepix I've used a short length of old garden hose to attach the Loc-Line to the base. Put the hose in boiling water to soften it first, otherwise it's very difficult to slide it over the Loc-Line.
Finally, I use a short section of an old wetsuit sleeve to secure the finished snoot to the strobe. The most important thing to remember when attaching your snoot is to line up the hole on the spindle with one of the flash tubes. This should be easy enough to do by touch alone if you've shaped the base of your new snoot correctly.
If you're still interested at this point, I've taken some photos showing the steps involved in creating this fibre-snoot. You can see them in the fibresnoot gallery here, along with some example images I've taken.
If you've got the time and patience or if you're not yet convinced that snooting is for you, then I'd suggest it's worth having a go at making your own. To save you time, I can source the component parts and send them to you in exchange for £30 (plus p&p), then you can get straight on and follow the instructions here to make YOUR own snoot!


15th February, 2013
French Crown
French Crown Winter's a great time for indoor photography so I set up my DIY drip photo contraption again - in the spare room this time. Pash wasn't ecstatic to see I'd pushed all her computer equipment to one side but I persuaded her it was all in a good cause!
This time, my aim was to create a crown shape and involve multiple colours.
When I've used water in the past, the results have looked a little... erm, well... "watery"; A bit washed out and a little glass like. I like these sculptures when they're done well but I always seem to have trouble setting the lighting up properly. I believe, I need much more diffuse light so a nice big softbox may well be the answer, although I cant picture how I'd get it close enough to light things up properly.
Anyway, I figured I'd use milk to get the molten plastic kind of look I was after. I dropped the milk from about 40-50 cm onto a sheet of black acrylic that I'd acquired at a local plastics shop (No, I dont have any idea how such a business has managed to keep going when the likes of Jessops and Blockbuster have gone bust!). Perhaps I should buy some more black acrylic sheets whilst I can?!
I've used blue and red food colouring to create the picture here. It's not the "cleanest" of images but I got so fed up wiping down the surface after each shot that I ran a few off each time. It just so happens that this was one that pleased me most.
They say a magician never reveals his secrets so I'll keep a few of my methods to myself, like how I get the seperate colours. It's nothing to do with image manipulation and I could definitely do better but what's the fun of producing a perfect image first time!? Most of the enjoyment in this kind of photography is the practice and the random nature of the results. No two images are ever the same!
Hope you like the image. Please click the facebook "like" button and share it if you do!


25th January, 2013
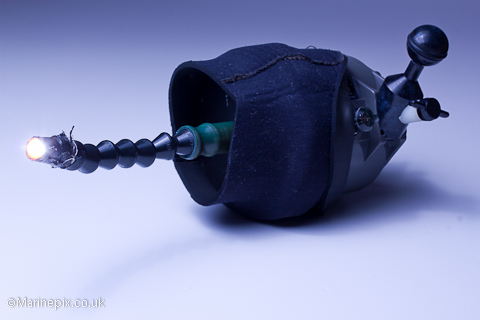
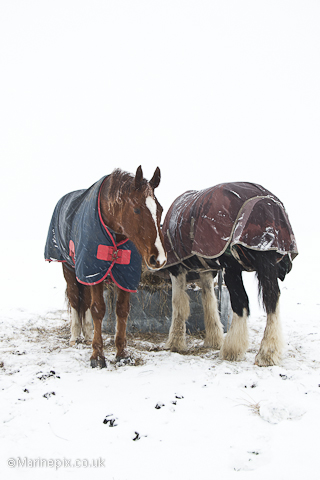
As some of you might be aware, it snowed last week here in the UK. Not big snow like Canada or Norway but enough for the country to grind to a halt. It meant I had to work from home which had the side-benefit of allowing me to get out in the snow and take a few pictures at lunchtime. I drove Pash and I up to Devil's Dyke - a high spot near home from which one can take in scenic vistas of the South Downs and the towns along the coast. The roads were treacherous (did I say it had snowed?) and there were definitely no scenic vistas and in fact we were out of the car only for about 10 minutes before the chilling wind made us retreat.
We noticed several horses in several fields, looking rather chilly despite their draughty, blanket type coats. (Do they make woolly hats for horses? They should.. I reckon that's another idea for Dragons Den!)
Anyway, the bright snow and the cold didn't cause the camera any problems... snow on the lens was the main issue. Once it's there, it's rather difficult to get rid of it without creating smears, especially with big gloves on. The only tip I've got is to point the camera so the lens is away from the source of the wind... No-one reads this blog expecting to learn secrets and ground breaking techniques do they? Does anyone read this blog at all!?
Here's a picture of some horses that were doing something. We saw 3 others that were stood standing at the edge of a field, all staring off in the same direction into the (completely white) middle distance. They looked rather unsociable to be honest so I didn't take their photos. I like this image because of the plain white background. It's much easier with snow, obviously but I also increased the exposure by a tad in order to make the snow even brighter, enhancing the whiteness of the whole scene.
I'm aware that one horse is facing away.. I did click and neigh at it a bit to try to get it's attention but I guess it was more interested in it's food. Hey! - that's horses for you!


25th January, 2013
Egg Laying Squid
Egg Laying Squid It's been a while. Christmas does that to me.. kinda distracts me from some of the stuff I enjoy - one of which is documenting my photography - even if no-one ends up reading past the first paragraph each time! ;-)
I run the risk of getting boring by publishing another squid picture but I was really blown away by the activity I saw that day in Ambon.. The animals werent frightened and they carried on much as they would've if we weren't there. This image shows the squid lining up to lay and fertilize eggs as well as the eggs themselves and the rope/mooring line to which they were being attached. The fact that there are 9 squid in this one shot hopefully indicates the amount of activity we encountered. They were all over the place!
I'm rather pleased with the way the shot-line runs up into the glowing ball of sunlight in this shot... I have to admit it's happy chance that it happened that way... I was concentrating more on the positions of the squid than the rope involved. Ordinarily, I'd take Martin Edge's advice and shoot with the sun behind me but since there were a number of divers present and the squid tended to stay on one side of the rope, I had to make do. I've tweaked the white balance a bit here so the colour of the squid is more realistic. It changes the water colour a bit but but I dont think it detracts from the picture. What do you think? I always fear putting large-sized images on the internet since I've heard of and seen so many images stolen from their rightful owner. As such, I'm limiting the size of images I post and I'm adding a watermark to each but if you click the image here you'll at least see a slightly bigger version. It's worth seeing "big"
Camera settings for this shot were 1/125th sec at f/11 using a Tokina 10-17mm fisheye lens (at the 10mm end) on a Canon 550D camera, nauticam housing and Inon z240 strobes.
If you like the image, I'd love it if you'd click the like button. It'll only encourage me if I think people are enjoying my photos enough to share them.


17th December, 2012
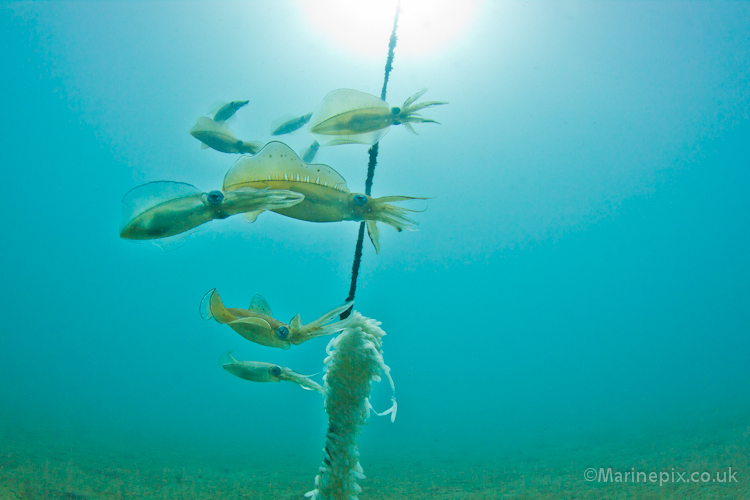
Ambon is one of the Maluku islands of Indonesia and forms part of a chain of volcanic islands surrounding the Banda Sea - home to some fabulous marine life. A group of 16 (mostly) BSoUP members stayed with Maluku Divers in Ambon Bay. There's an awful lot of garbage in Ambon Bay. Periodically it gets washed up on shore by the tide. My girlfriend, Pash organised a beach clean-up one day and got about 30 people, including resort staff and several local villagers out onto the beach filling bags with rubbish. Seems that the government dont have an organised method of refuse collection so the next best option is to collect the rubbish and to incinerate it... There are plans afoot to build processing plants to convert the plastic into fuel but for now, burning the stuff at least stops it polluting the water and thereby the fish which are the staple diet of the Islanders!

Rather than post a picture of some rubbish being washed up on the beach, I thought I'd share an image which has already been requested as a print but which also was a memorable experience for me in the water... The dive site was nothing special above water and even below the water, there wasnt much to see, however, We came across a rope, attached to a buoy on the surface. Around this rope were about 15 squid. They were mating - the female would attach an egg to the rope whilst a male shielded her from other male attention. Once the egg was attached, the female withdrew and the male fertillised the egg before accompanying the female to a couple of metres back from the rope. Once they'd had their turn, another pair of squid would move in and go through the same procedure. It seemed like they took it in turns. Every now and again, a rogue male would attempt to move in on another's female and there'd be flashing of skin-colours and a display of tentacles from both, generally resulting in the existing male regaining his position with the female.
The squid didnt seem phased by having several divers mesmorised by their dance like movements and it has to go down as one of the most memorable dives I've done to date.
I've not uploaded an Ambon gallery yet... that will come soon and I'm sure there'll be another post here too.
I HAVE uploaded a couple of photos to my 500px account. You can find that here at www.500px.com/marinepix
PS. Feel free to vote for my images on 500px if you like them; and please do consider clicking the "like" button below this post if you'd like to hear/see more.


29th, October, 2012
Natural History Museum
Natural History Museum 
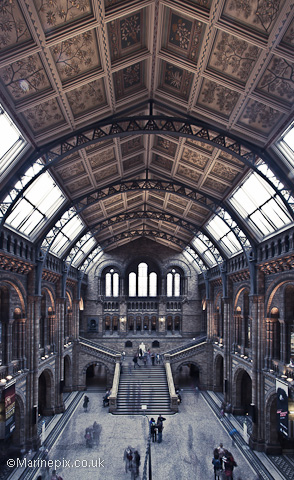
This is very much a work in progress but I've seen a couple of photographs of the Main Hall of the Natural History Museum in London which have really inspired me. One such image was by a chap called Michael Walker-Toye.
When I visited recently, I didnt get too long to consider what I was doing, nor did I have useful things like neutral density filters but I think if you want to acheive a certain thing with your photos, it's sometimes worth doing a bit of an investigative session first... scout out the area, take a few "test" images, see what you can do with the results, etc. then plan your next visit with a bit more knowledge.
Of course, you can always ask the person who took the original image! Generally I think you'll find people quite obliging and open about how they took pictures. Personally, I feel rather honoured if someone is wanting to emulate what I've done and I'm happy to divulge any thoughts I might have.
So anyway, what I'm aiming for here is something Escher-esque. Escher was the chap who created three-dimensional optical illusions of never-ending staircases and waterfalls that seemed to flow upwards... Pretty easy to find him on google if you dont know who I mean! I reckon I've made a reasonable start... Next time, I'll change my viewpoint, I'll take a ND filter and I'll maybe take some varying exposures since there are some really nice stained-glass windows at the far end which I'd like to include in the image. The natural history museum is a big place and I'd recommend going in through the main entrance if you want to find the grand hall without too much effort but if the queue is too long, or if it's raining and you dont mind the walk, try heading for the side-entrance which isnt as popular so you get inside sooner. There's lot's to see at the museum and I could've spent much longer in there but I'm really pleased I've had chance to check the place out and I'm already looking forward to my next visit.


28th September, 2012
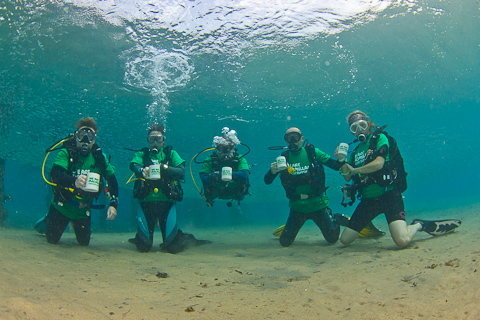
It's been a while since my last blog entry. I think I've been occupied with things other than photography but I went to Nuweiba in September this year. Towards the top of The Red Sea in the Gulf of Aqaba lies Nuweiba, about an hour and a half's drive north from Sharm El Sheik Airport. I'd been once before and this looked like it'd be the last chance we'd get to go and visit our friends Chris and Jenna who are running the Emperor Divers operation there at the Hilton Resort Hotel. Chris and Jenna are shutting down the operation in mid November due to a lack of business. A real shame because it's a fantastic destination for those wishing to learn and for those, like me, wanting to practice their underwater photography!
This year's trip coincided with the Macmillan Coffee Morning event which was being organised at various locations around the world. Our good friend Nici Bauckham, a manager for Macmillan in the UK suggestted an underwater event whilst we were on holiday. The picture here is one of the better ones I managed. I realised its very difficult to organise even 5 people into a position with some symmetry and where everyone is looking at the camera! Those who take photos of weddings, graduations and other events are very lucky to be able to use their voices to coordinate their subjects. Trying to do it using hand signals is not easy, especially once the strobes have fired once and everyone's attention is elsewhere. It's also very difficult to ask someone to "say cheese" when underwater. Perhaps next time I'll have a piece of cheese drawn on an underwater slate so I can hold it up at the right moment.
Craig, pictured here 2nd from right, completed the final parts of his PADI open water diver course whilst we were in Nuweiba. Just a few tiny bits of paperwork to complete and he'll be a fully fledged diver, hopefully to join us on some dives in the UK and perhaps some other dive-courses too!! Congratulations Craig!
Other images from our trip to Nuweiba can be found in the Nuweiba gallery by clicking here.


16th July, 2012
BSoUP Splash-In
Underwater Photography Championships winner - Hermit Crab This year's BSoUP, British Underwater Photography Championship took place in Plymouth at the weekend. Thirty eight people registered as participants with rules stating that submitted images needed to be taken between Friday night and 6pm on Saturday when the judging would start. Seven of us chartered a boat (UK National) to dive off-shore and we headed out to a nearby sheltered site called Pier Cellars with a depth (we found) of no more than about 8 metres.
The seabed was thickly covered with kelp which made it difficult to find subjects... I saw star-fish, small shrimp and skittish, sand coloured-fish but I was hoping for something with a little character which I could distance from the background in some way. When I found the sandy area at the edge of the kelp "forest", I also found the subject of the photo here. I observed the crab's behaviour for a while and then settled the camera in a bare patch of sand, close enough to get the crab in frame whilst also allowing a little "breathing space" around it.
I took several shots before I got my lighting right - I was using 2 strobes, one with a snoot, the other just to lighten the shadows. When I got the lighting right I moved the camera with the crab, waited until it was atop one of the gentle ridges in the sand and then fired off another 2 or 3 shots. The image here turned out to be the best of the bunch.
The rules of the competition stated only post-processing adjustments to the whole image could be made. As such, I boosted the contrast and the colours a little before I submitted my image.
I was really thrilled to receive my prizes which included a commissioned piece of artwork from SubAquaticArt and a dive-cylinder cover and canvas print from ScubaCool as well as the BSoUP trophy
To be honest I was a little shell-shocked and was unsure of the correct procedure for accepting an award! I'm still not sure if my eyes were open or closed for the official photos, nor if the trophy was the correct way round but I know I had a smile on my face!
There were 4 categories for submissions. My image won the crustaceans category which was announced on the day.
You can find more details on the BSoUP website.
Thank you to BSoUP for making it all happen and many congratulations to all the other winners!


23rd June, 2012
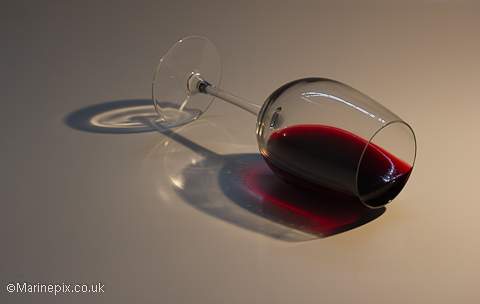
I've been listening to a "tabletop product" photography online course run by CreativeLive. This company is based in Seattle and they generously broadcast free photography courses on a regular basis via the internet.
With the time difference it means staying up way past a sensible bed-time in order to watch but I've picked up lots of information and tips along the way.
The guy conducting the online course covered many (but not all) of the subjects in a book I had recommended to me called "Light, Science and Magic". I've read this book cover to cover and I still find it interesting to dip into. Each chapter is dedicated to a different challenge in photographic lighting (glass, wood, metal, etc) and it takes you through the principles of how to get the lighting you want and avoid the lighting you dont. I've now noticed that the 4th edition of this book has been published so I'm rather keen to get that. The link above will take you to Amazon where you'll be able to see other people's reviews too so dont just take my word for it! :-) Anyhow, the image here seems to be appropriate. Although I had only just started reading the book at the time I took it, it was enough to make me consider the lighting. My intention was to create something interesting to look at. The lights needed to be tweaked numerous times before I was happy and I ended up creating my own 6-bulb studio light
and reflector during the process. This was really my first effort at manipulating lighting so I'm not claiming it's perfect at all but it's a start. I used a thin sheet of white plastic - the reverse side of an old advertising poster which work had thrown out to create the shiny, continuous background.
I proved to myself that I'm capable of lighting things properly but it also proved to me that I need some better lighting equipment! I think I'll be purchasing a soft-box in the not too distant future!


21st June, 2012
Dappled Light
Coral reef under dappled light! I've been attempting to "tidy up" my library of photos and of course, in the process I've come across several images that I really like but haven't shown before.
I spent a week in Djibouti earlier this year with the intention of diving with and photographing whale-sharks under the tutelage of renowned underwater photographer and author, Martin Edge. Martin's book is well worth checking out... There's a link to the book on Amazon here.
It turned out that we only needed snorkelling gear for our encounters with the whalesharks but since we'd taken dive gear, it seemed rude not to do a dive or two. There was a lot of shallow reef near where our boat was moored and an early morning dive meant the sun would be low in the sky over the reef.
When the light is low in the sky, it tends to create a rippling, dappled light effect with beams of sunlight coming down through the surface of the water. In itself, this is fantastic to see but when there's an interesting subject in the foreground, the rays of light can enhance the colours and interest and produce some amazing patterns
I took the image you see here at 8am. The sun had JUST come over the top of the mountain ridge in the east and was creating the dappled light. The fish almost seemed to be attracted to the light and as they repeatedly gathered and dispersed, I took several photos. This was my favourite since the composition of the coral, the fish and the light all seemed to come together for me.
I've created a whaleshark gallery for the Djibouti trip but I've not shown these reef images before. You can click the image above for a larger version.


5th June, 2012
Garden Weeds
dandelion in my garden! 
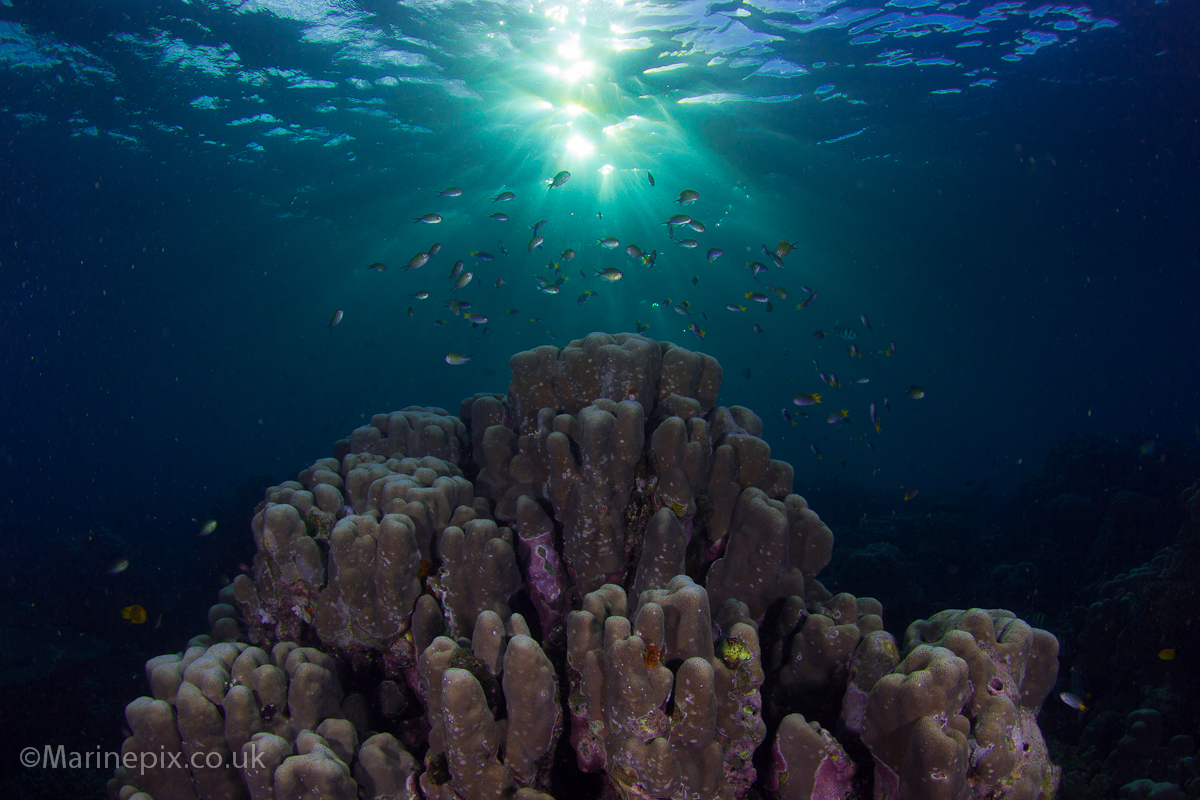
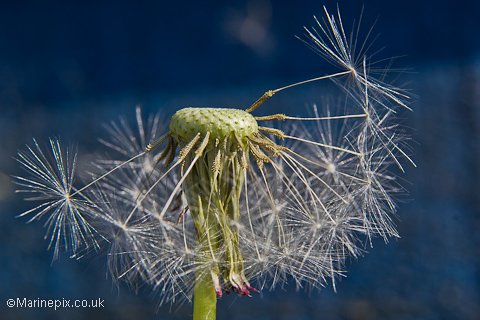
I had to wait a while before I finally found a dandelion in the garden in a state it could be photographed.
That's not to say the garden is altogether free of weeds but it was a dandelion I was specifically looking for. It was a sunny day so the light was harsh but it also meant I could vary the settings on the camera without worrying about the image being too dark.
I set up the tripod and camera and proceded to work my subject. Using a 60mm macro lens with (and also without) a teleconverter and a 25mm extension tube meant my depth of field (the area of the photo in focus) was razor thin and as a result, I got really frustrated with the miniscule amount of breeze that was blowing... I had to pause for every tiny movement of the dandelion as it phased out of focus, patiently waiting for it to settle back again before I pressed the shutter button.
I practiced using "mirror lock up" at one point to reduce any remaining vibrations but even then I found it to be rather hit and miss since there was a slight delay between composing the image, locking the mirror up and actually shooting the picture which was enough to allow the plant to be blown out of focus!
So, needless to say, in the end, I had a huge number of photos to browse through and inevitably many of them were very similar. Towards the end of my session in the garden, I blew some of the seeds from the head of the dandelion and captured this shot. It's different from all the others and I think that's why I like it.
It's possible the white smudge above the seed head could be judged as a "distraction" but I left it in because it's a single seed that got caught on the wall of the shed which I was using as a background.


30th May, 2012
College HDR
Lancing college 
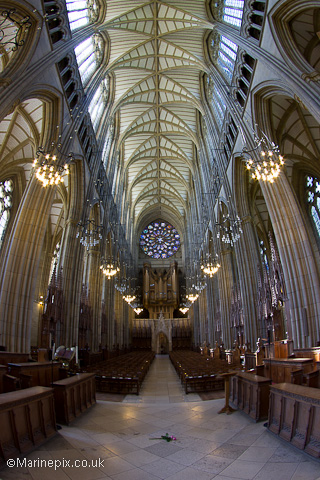
Lancing college is just up the road from me in Brighton and on a whim, on a hot sunny day, my better half and I went along to see what it was like for photography.
The college had been recommended by a facebook friend and I was impressed with the photo he'd taken so I wanted to see what I could do.
Since I've also seen and enjoyed a number of high-dynamic-range images on 500px.com, I decided I'd work on my HDR skills in the amazing college chapel.
I'm posting 2 images this time. The first is one of 9 images, each taken using a slightly different shutter speed (with the camera mounted on a tripod!) which I combined to create the second image shown here.

lancing college hdr 
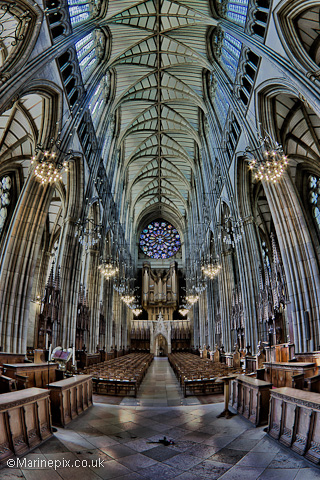
I downloaded a trial of Nik Software's HDR Efex Pro application and used that with my 9 images.
I was surprised that there weren't more options such as those I'd seen in Photoshop HDR Pro but I soon realised that, even without them, I could generate loads of different image

The main problem I had in this case was where to stop... Since I didnt have a final image in mind, I chose something which I thought was dramatic, yet still somewhat realistic.
The idea with HDR is to show detail in the shadow areas and the highlight areas within the same photo. It's something I know Alex Mustard is investigating underwater, so far with some interesting results. I hope at some point, I'll have the opportunity to have a go at the same kind of thing.


22nd May, 2012
Selsey Scorpions
scorpion fish - diver in the eye detail A break in the poor weather and an invitation from my friend Nick to join him for a dive in Selsey was too good to miss.
The visibility in the chilly, early-morning water was around 1-2 metres so quite adequate for macro photography, especially with the snoot I was intending to use... This DIY job was in fact a 60 pence funnel with the end cut off and part of an old wetsuit sleeve to hold it to my strobe.
There was a LOT of surge (back and forth movement of the water) so I found the main issue was staying still enough to line up a shot with the subject in focus, the snooted light pointed perfectly and then get a decent composition into the bargain! I took so many shots which were slightly out of focus or which had part of the animal slightly out of frame. When you put such effort into shots, I think it's natural to regard them as your "best" images but in my experience, it makes no difference to those who are casually looking. People like colour, contrast and things which either show character or mood or imply a little "story" behind them. I think this is something I need to practice.
The image here is of a scorpionfish - it was about 8 inches long and wasnt spooked by me repeatedly looming then retreating in the frustrating surge. I've used the snoot lighting to enhance the mood a bit, as well as to isolate the subject from its background and reduce backscatter.

The conditions meant I had to put a lot of effort in but what makes this image is (I think) that by shear fluke, reflected in the eye of the fish is my dive-buddy Nick with the beam of light from his torch pointing ahead of him. Very tricky to see here so if you click on the image, you'll see the larger image.


16th May, 2012
Ninja Crabs
Swimming Crab 
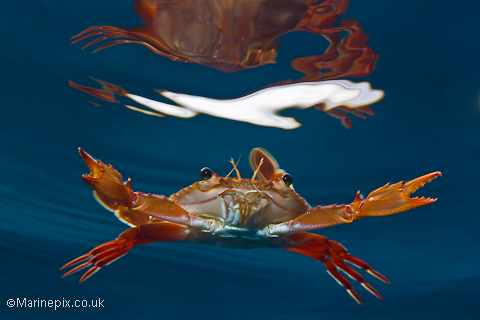
Not actually taken on the 16th of May, this crab is one of several (hundred) thousand that live in the waters of the Red-Sea off Djibouti. I was there back in January on an expedition to photograph whalesharks but these nippy little guys were such a "feature" of the trip that I had to take a few images of them too.
Last week I submitted this image to the monthly BSoUP (British Society of Underwater Photographers) competition - this month entitled "crustaceans". Since the judging is occurring in London as I type, I dont feel I'm affecting the votes in any way by writing this now!
Not being a Marine Biologist and not wishing to give out dodgy information, I'll just say that this is a "red swimming crab" (Perhaps one of my Marine Biologist friends can help out with a decent species name?).
We have velvet swimming crabs in the UK, although I've never seen one actually swim, but these guys in Djibouti were surrounding us as we snorkelled way above the bottom of the sea. It's possible they were feeding on the same plankton which the whalesharks were after. It was clear that the whalesharks were fussy eaters since any crabs that were inadvertantly vacuumed into a shark's huge gaping mouth were soon "spat out" again. Actually, it could well have been because the crabs were using their needle-sharp pincers as weapons... A whaleshark's skin in pretty thick and tough but the little crabs could inflict serious pain!
In fact, I've not encountered another creature in the ocean which so enthusiastically wanted a piece of me... I've no idea if the crabs were defensive, aggressive, curious or hungry; all I know is that it hurt!! Still, they made an amusing talking point and I'm rather pleased with the resulting images I obtained. I hope this one will do well but since the competition is entered by many seasoned professionals, I shall not worry too much if it doesnt generate too much interest. I hope you like it!
Update: My image came SECOND in the competition!! How completely excellent!
You can click here to see the top 6 entries on the BSoUP website!


12th May, 2012
Splash Progress
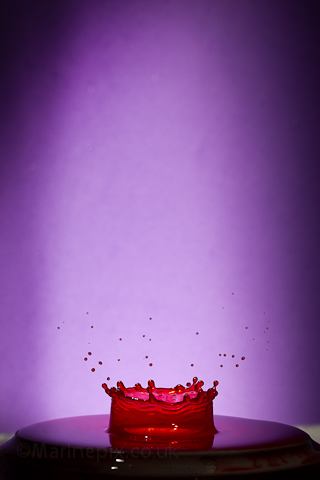
I sacrificed a couple of hours of much needed sleep to set up my drip-stand again, this time with the intention of playing around with the lighting a little more.
I set up one of the strobes I normally use underwater (Inon Z240) to fire at the same time as the flash unit (Canon 430EZ). I pointed the flash at the backgound and triggered the strobe using the fibre-optic cable which I'd usually use to attach it to my underwater housing.
Initially, I tried to balance the strobe on top of the two articulated arms used to position the light when it's attached to my housing. Unfortunately, the strobe is heavy and the arms are light so after swearing at it a bit for being wobbly and off-balance, I decided to re-attach the whole thing to the housing in order to get a much sturdier base.
I attached a funnel type thing to the strobe which acted as a tiny circular snoot - creating a tiny circular patch of light wherever I pointed it. I then carefully positioned the housing and strobe so this snoot pointed directly where the splash would occur.
From that point on, it was fairly plain sailing! The power of the flash was a little too much relative to the power of the snooted strobe so I will aim to correct that in a future exercise. I'm also keen to try lighting the background which should ensure I get a more natural vignette (the black edges round the image) - In the image here, the left hand side of the vignette is something I added artifically to match the one already appearing on the right.
I got several new types of image but before I could start changing things further, a wire came loose on my electronic trigger kit! With my resident engineer unavailable, I packed up for the night. Once the thing is mended, I'll be back!
I've added this and another new image to my Liquid Art gallery


6th May, 2012
Derelict and Spooky
So, I bought myself a remote shutter release and intervalometer! I thought, what better way of doing long night-time exposures to capture star-trails. To be honest, I hadnt researched it much - I just wanted to have a go at star trails!
Some time ago a friend at work had told me of an old abandoned church in the depths of a wood which he'd visited. It sounded interesting but I didn't get a decent opportunity to visit.
Just recently, I was reminded of this place when a friend published some timelapse videos that he'd taken here. I decided to head down during the day and scout out the location.
Luckily, that same night, the skies were due to be clear so I decided to return with the camera gear. Being rather wary of old churches in woods at night, I called on my regular photo buddy but he was otherwise engaged so I plucked up the courage and went alone. Now, for decent star-trails, the best times are between two hours after sunset and two hours before sunrise but since this was just a practice run, I pitched up at 9:30, set up my tripod and proceeded to fiddle with my intervalometer... I thought if I could get some nice timelapse photos as well as star trails, then I'd be onto a winner. I let the intervalometer do it's work for a few iterations before I got bored and decided to check the results. There was such a small patch of sky visible through the trees that I deliberated on other things I could do instead of star-trails. I had a torch so I started light-painting the church interior during long exposures of varying length. Some of the images were quite pleasing.
Since it was dark and very quiet with only a hooting owl to break the silence, I was rather disturbed when a van drove slowly past on the road about 50 yards away, reversed until it's lights lit up the top of the church wall and someone shouted "yeah, this is it". I assumed, as anyone would in the situation, that it was two murderous satan worshipers, come to offer a horrible sacrifice but thankfully, there were no footsteps in my direction. No doubt entirely due to my nonchalent torch waving and noisy feet-shuffling. From that point on, I was spooked and every noise was something I had to check out so I didnt really have too much fun after that. However, I think I managed a few decent practice shots and I've an idea what to do better next time. All I need now is clear skies and a photo-buddy with a lot of patience. According to reports, it's rain and cloud until the end of May so dont hold your breath for any more just yet! Check out some of the more interesting images from the night, here.


6th May, 2012
Splash Art
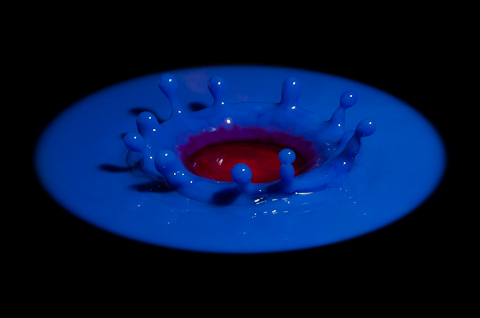
It's something that I've had a go at in the past (with limited success) and I've wanted to try again with some more control so I obtained a "drip kit" from a local government contact I have, I constructed myself a wooden frame and I had an electronics timer built by a brilliant engineer I know.
I started dripping water into bowls of water to get a "spike" of water rising from the bowl. To freeze the action, there were two options. Have the camera triggered by the timer unit and use a very high shutter speed or, have a seperate flash fired by the timer. I chose the latter since it had been recommended, plus, I knew that the flash duration was far quicker than any shutter speed my camera could come up with.
Following some success with the spike photos, I inverted the bowl to try creating "crowns" which are the result of much shallower water. Really, I was playing around with the timer, making sure I could get the shapes I was after. It was clear that I could but I needed to get some better lighting since my images lacked colour.
After some experimentation, I found that the water tended to take on the colour of whatever was surrounding it so I started propping up bits of coloured paper, etc. This too proved somewhat successful although it was clear I needed more practice. Finally, that evening, I started playing around with milk and food colouring. I guess milk itself would've been fine.
The image you can see here is the result of blue and red food colouring in milk, on a shallow saucer, with a "snooted" flash (where the spread of the light from the flash is limited by bits of cardboard). I've cheated a little in that I've enhanced the dark edges to the point where nothing else is visible but I'm hoping, when I get another chance to use my drip-kit, I'll be able to improve my lighting.
More splash images from this and my previous attempt (without the timer kit) can be seen here.


6th May, 2012
Yellow Fields and Models
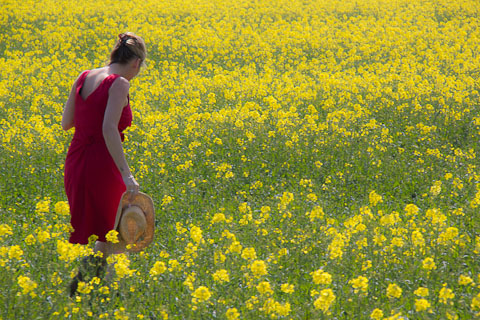
I wanted to make good use of the yellow fields of rapeseed which I was shooting the other week (see my 7th April blog entry) and I decided that the addition of a model would be interesting. Actually, I had been planning a shot like this for a couple of years, ever since the poppies shoot I did a few summers ago.
So I asked Nici to join me for a few minutes at the top of Devil's Dyke whilst the sun was out. I figured a red-dress would contrast well against the yellow flowers and happily Nix obliged!
I'm not advocating the jumping of fences but there was a definite advantage to being close to the field of colour. Using the lens, I was able to compose most of the images so it looked like Nix was in the middle of the field although I'm happy with a few where the edge is obvious.
It didnt occur to me until later but I hadnt asked if hayfever would be an issue... Well worth bearing in mind before doing this sort of thing!
I've softened this image slightly using the clarity slider in lightroom but apart from that everything is what the camera produced. I used a shutter speed of 1/125 sec which has resulted in slight motion blur. I put this down to that fact I was moving about quite a lot and stooping down at the same time. The blur doesnt show much in a small sized image like this so I'm pretty happy with it.
If I had to change something for next time, it'd be the time of day... With the sun being quite high in the sky, shadows on faces arent too flattering. I'm pleased, therefore I took some shots at a distance, which included the landscape a little too.
The other camera settings I used were f/10, ISO 100 and I used my 18-200mm lens at 155mm focal distance.


14th April, 2012
West Pier
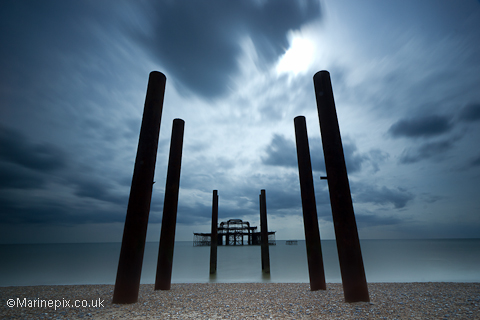
As I mentioned in my last blog entry, I was on the beach in Brighton taking photos of the west pier.
I thought it only fair that I share at least one of the images I took although it's not the only one I liked. (I'll add others to my Brighton gallery at some point in the near future).
I wanted the water to look smoooth and calm and although it was reasonably calm that day, my aim was to remove the texture altogether and make something a bit "unusual". I used a Lightcraft workshop, 9-stop neutral density filter which gave me the chance to keep the shutter open for a long time (30 seconds in the case of the photo here)
Since the sky is brighter than the land/sea, it's difficult to bring out any kind of detail in the cloud just using the camera. The only option being to use a graduated neutral density filter. I borrowed such a filter for a few shots earlier in the afternoon but had handed it back prior to taking this shot. As such, I've had to add the ND grad filter effect using the computer. It's not quite the same but it does help to bring out some drama in the sky.
Although the pier could be deemed to be the central point of the image, I was really hoping to generate a sense of being small, using the old pier legs to point towards the sky.
If there was one thing I could change, it would be the small piece of metal sticking out from the pier legs which I think is just a little distracting, although with the size of image here, it's maybe not too obvious.


14th April, 2012
Burling Gap
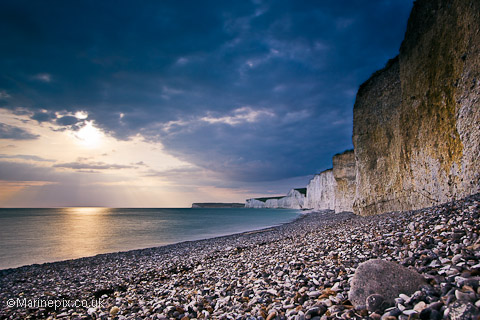
After spending some time on Brighton Beach with some good friends, taking pictures of the old West Pier, I thought I'd take them to Burling Gap near Beachy Head for the sunset.
Admittedly, it was a little overcast and the clouds weren't terribly dramamtic but it's still been possible to create some drama in the resulting images with a little manipulation.
I took a LOT of images so choosing my favourites was rather tricky. Some of the images were easy to reject - I removed all the out of focus ones and any where tripod legs or people were in the way. Second, I rejected images where the sky was too bright or the stones too dark.
The position of the cliffs in the picture was also important. Not too much, not too little and a reasonable curve to draw the eye towards the end of the cliffs.
I ended up choosing this picture because of the rock in the foreground which gives a little extra "interest".
Like I say, I've done a bit of manipulation on this image - I've increased the colours and boosted the contrast and I've also brightened the cliffs. The weather really wasnt doing me any favours so I'm hoping to re-visit on a day when the sunset is more spectacular! I tend to learn more from doing than from reading a book so, I'm happy to say I learnt quite a lot on this outing.
Just for interest the camera settings were f/9.0, ISO 100, 4 second exposure. I was using my wide-angle 10-22mm lens set at 16mm.


7th April, 2012
Yellow and Blue
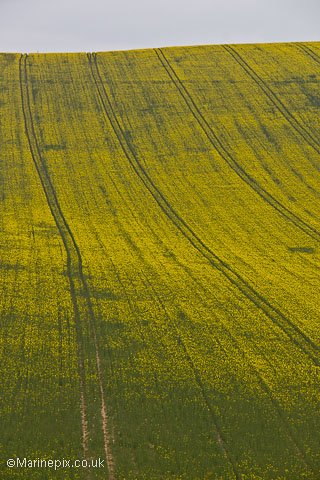
Had a bit of time today so I thought I'd explore, to find out where might be the best (and safest) place from which to take a picture of the lovely rape-seed which has come into flower on the side of devil's dyke near Brighton.
The issue really is that the best vantage point to capture the regimented lines in the field turns out to be the middle of the dual carriageway!
Well, after a bit of driving around, and a considerable walk, I discovered an opportunity and the image here is one of about 30 I took before I chickened out and made it back to the safety of the public footpath!
Since I had a bit more time, I thought I'd explore some other shots of this field of yellow so I headed back to the car and drove up to the top of the Dyke where I was able to see the sea in the background.
Not wishing to get too much in the way of "industrial Brighton" in my nature image, I had to crouch or stand on verges to get what I wanted.
If you have a look at the gallery I've created, you'll see the sky was rather overcast so I've boosted the contrast of some images to emphasise it.
Next sunny day we get, I'll head back to the same place to see if I can get some more intense blues behind the yellow flowers.


2nd April, 2012
Stalking Storks
Stalking Storks
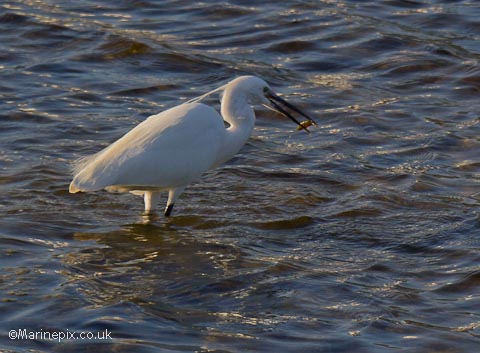
Widewater Lagoon is in Shoreham, near Brighton and it's a great location for bird-watching. We went with the intention of feeding bread to the birds as the sun went down but a sign informed us how cruel we'd be if we did so!
Well, suitably disappointed by this news, we decided not to stay too long. There werent that many birds around anyway (probably because they werent being fed!) so we didnt feel TOO hard done by!
As we drove away from the site, I spotted a heron type bird (bird identification is not my forte) wading in the shallow water. I abandoned the car, scrambled down the grassy bank and got as close as I dared.
I fired off shots whenever I felt the bird was nicely lit by the late-afternoon sun. I was disappointed the bird wasnt facing INTO the sun but I guess that wouldve made it's task of searching for fish more difficult.
The other thing I noticed was the bird was clearly watching something in the water so I anticipated it would strike pretty soon. Luckily, I was right and by waiting for the right moment, with the camera in position, I was able to get a number of shots of a poor fish's demise!
I took this picture using my 18-200mm lens and I've cropped it to ensure the fish in the beak shows up in the small image here. The only way I could've got closer would have involved getting my feet wet!
Hmmm - maybe I'll invest in a pair of waders!


1st April, 2012
Nudibranchs at Dawn
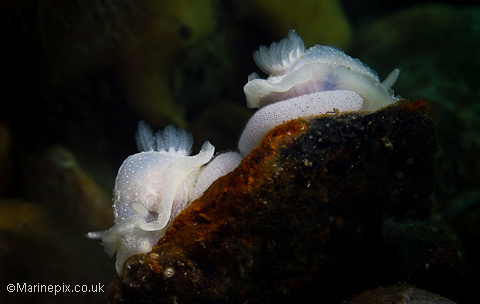
The alarm clock went off half an hour later than planned this morning but luckily I'd prepped all my dive and camera kit the night before.
The plan was to dive in Selsey, under the lifeboat station and despite the slight chop and the early start, many others were diving too!
Last weekend, I missed the reported hoardes of nudibranchs so I was hoping for better luck this time!
It took me about half an hour to spot my first one but by that point I'd adjusted my lighting on numerous different subjects, including pipe-fish and anemones, building a good feel for light power and position.
I was using a home-made snoot on my right hand strobe... made from a funnel with an old piece of wetsuit sleeve to keep it in place. The left strobe had a diffuser in place and I used it to create a bit more light on each scene, enabling me to highlight subjects or parts of a subject with the snoot.
I came across a pair of white nudibranchs, both laying eggs on the same piece of rusting debris. This bit of metal actually helped my composition since it raised the two creatures away from the ground and allowed me to get the camera down to their level, hence allowing me to seperate them more easily from the background. I used an inward lighting technique with the main strobe to isolate them even more from the background and I started shooting.
Since I wanted to get each nudibranch and it's eggs in sharp focus, I used a high f-stop (F11) and adjusted my shutter speed accordingly to work with the light I could get from the strobes.
It's a shame the nudi's werent both facing the camera but I dont like going round moving the wildlife to suit my photos so I'll just have to revisit and keep looking!!


23rd March, 2012
Brighton Gold
As the sun sank towards the horizon, I spotted a couple on one of the enormous breakwaters near the Marina in Brighton. The sky was lighting up with an orange-red tinge and since there were no clouds, dark shadows were being created everywhere. I took the opportuntity to photograph this couple using my long lens (18-200mm) with the golden colours of the sun reflected in the sea.
I fired off a number of shots before noticing the repetitive, dark lines of surf in the water. I waited for a moment when the couple were not being disected by this line before firing off a few more shots.
Of course, candid shots like this rely on a good deal of luck and the image which "works" is often not the most technically perfect image.
I ended up choosing this image from the 10 or so I shot because of the position of the couple and the well-defined silhouette that the two of them created against the sea.


23rd March, 2012
Brighton Photo Opportunities
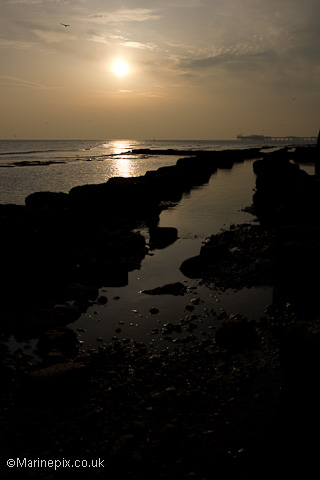
I headed out last evening to meet up with a friend who was planning to create time-lapse photos overlooking Brighton as evening fell and the lights came on.
I left him setting up equipment on the upper level of the Marina car-park and headed down to the beach where I'd seen some exposed rocks running along the shore.
Predicting a nice sunset due to the reasonably clear sky, I wanted to capture the scene with my ND500 filter - a neutral density, 10 stop filter which I knew I could use to smooth out the water whilst the sun was still high in the sky.
I used the exposed rocks to provide a lead-in line for the image, my intention being to guide the viewer's eye towards the details in the distance... In this case, the Palace Pier - a thriving hub of activity and entertainment and a notable Brighhton landmark.
The ND filter worked well, although it created some vignetting (darkening around the edges of the image).
My thoughts on examining this image futher... I'd like to try getting much more foreground detail.. the pebbles on the beach are also a well known feature of Brighton and the texture they'd introduce in the foreground, I feel, may increase the overall appeal


23rd March, 2012
Garden Closeup

Taking macro photos, especially of insects, is something I love to do. It's amazing how much detail you can see in a nice sharp photo.
One thing I've not seen too many photos of is ladybirds... I spotted one in the garden whilst setting up the camera for a lovely shot of a bee sipping nectar from a flower. ( Since the bee didnt cooperate, I dont have that shot to show you!)
The bug was resting on the stem of a blue hyacinth flower and I thought the green and blue against the red of the insect would look really nice. Something I confirmed with a couple of hand-held test shots.
I didnt have my tripod with me so I was relying on a reasonably fast shutter speed (1/200th) and I braced myself against a block of wood to ensure focus was as accurate as possible when the shutter release was pressed.
At this point, I was using my 60mm macro lens together with an extension tube which effectively increased my focal length. I knew the depth of field would be minimal so I upped the f-stop from the minimum, keeping my ISO at 100 for as much clarity as possible. I played around with settings and I think, with a tripod I may have been able to get better shots but on the other hand, this little bug didnt "rest" for too long and I'll tell you it's rather difficult to take extreme closeup shots of moving insects!


19th March, 2012
Tramps at Sunset
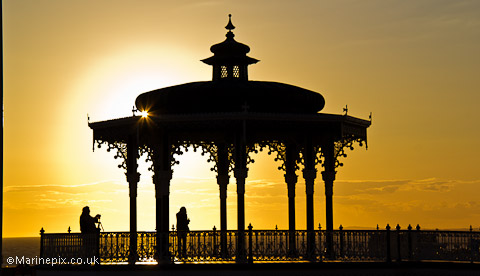
We drove into Brighton along the seafront road with the intention of getting to a point where I could get shots of either of the two piers in the sunset. Unfortunately, as is often the case in Brighton, the traffic was against me!
I made it only about as far as the West Pier before I decided to change plan and park up. Part of the reason was a large flock of seaguls gathering on the rusting metal structure. Well, I got a few shots from the prom using my 18-200mm lens but frankly I wasn't really enthusiastic with the results... A flock of birds, in the distance, with no real formation or pattern to them is not terribly appealing.
The light was pretty good though so I looked around for ways to use the light in a photo. I was looking for a landmark or feature to place in the foreground in some way. The bandstand is what I noticed and what I then spent until the sun had set working with. Luckily I had the tripod in the car so I set about it. There were lots of people desperate to get into my picture so I tried to "use" them in my shots. I think, in this case, the silhouettes work pretty well.


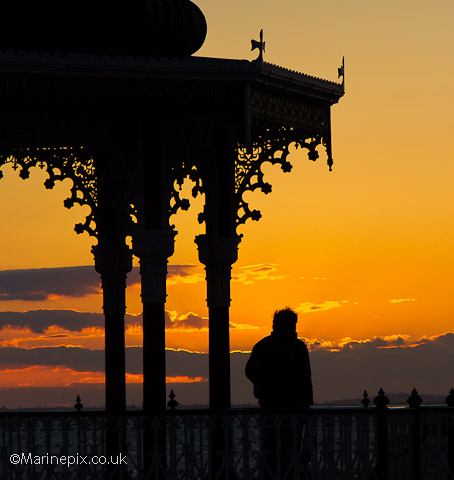
As the sun dipped further, I had to take all the opportunities I could to capture the sunset.
Since there were people determined to be in my picture. I figured I would remove the offenders from my final images by cleverly merging similar photographs (where the person was in different positions in each) so I took even more pictures than normal of seemingly the same scene! Wow! what a lot of photos to go through on the computer!
In the end, I liked the look of the one shown here.
The guy here looked so dishevelled and bored, he inspired me to start a new collection of photos which I'm calling "tramps at sunset".


15th March, 2012
Reflections
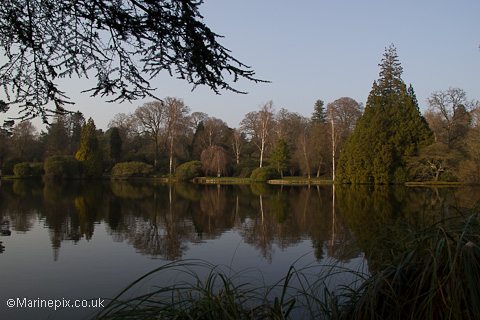
Sheffield Park, near Haywards Heath is a National Trust property with several lakes and hundreds of beautiful old trees.
It's a tranquil place with lots of photo opportunities. We've had a pretty good start to the year in terms of weather and the trees are showing plenty of colour already.
My aim in the photo here is to show the reflections of the trees, and the nice blue sky. The sky is perhaps a little washed out but I feel thats mainly because the sun was over to my left rather than behind me...not an ideal position for blue skies. However, the sun in the position it was has brought out more texture in the trees by creating shadows. It's also created a faint golden glow to the image.
The scene really deserves a panoramic image showing the architectural bridge to the right and the stately manor house itself off to the left. However, I am rather pleased with this image as it is - the trees have good colour, the water is still enough to give a decent reflection and the tree branches above-left and the grasses below-right tend to frame the subject nicely


5th March, 2012
Horsey HDR
Devil's Dyke isn't too far to travel from Brighton. When I headed that way I was aiming just to catch a breath of fresh air, ponder the view from the top and perhaps take a few snaps. On the return journey, we spotted a few horses in a field and decided to stop. Animals can make great subjects and I was pleased with some of the images I got since the light was in the right place to cast a nice orangey glow.
When I got the images home, I decided that the sky looked a little washed out behind the horse and so I started playing about with HDR (High Dynamic Range). The normal idea with HDR is to blend together several pictures of the same scene which have been taken with different exposure settings.
In doing so, a greater amount ("higher range") of light-information is available for manipulation.
The way the information is manipulated is purely personal choice and I've chosen, in this image to emphasise the texture of the horse's skin as well as recovering details of the cloudy sky which weren't visible in the original photograph.


25th December, 2011
Five a Day
I'm inspired when I see other people's images of an every day object made to look interesting by clever use of lighting.

I'd had the idea for this photo in my head for a while so I dug out my flash-units, two chairs, several pieces of perspex, bits of white and black card, several clamps, a tripod and the fruits I'd purchased at the supermarket earlier in the week.
My idea was to create something which looked, to all intents and purposes like a single fruit. The obvious problem is that the fruits are all different sizes but a sharp knife resolved that one fairly quickly. I suppose I couldve spent MORE time slicing them up and measuring accurately but I wanted to get some images onto the memory card.
I tried blu-tac to support the structure but it either showed up in the photo or was too ineffective.
In the end I resorted to a couple of cocktail sticks and a little "cloning" in photoshop to remove them from the final result.
The lighting is rather harsh on top so I think I'd like to try again with some kind of diffuser in place. Perhaps a soft-box or even one of my studio lights with a shoot-through umbrella in place.